

H2 Demonstration Recording#
Record the simulated Unitree H2 picking up an apple with its left hand, transferring it to its right hand, and placing it on the plate. Use a PICO 4 Ultra headset and its handheld XR controllers to record five accepted demonstrations, then replay the saved file.
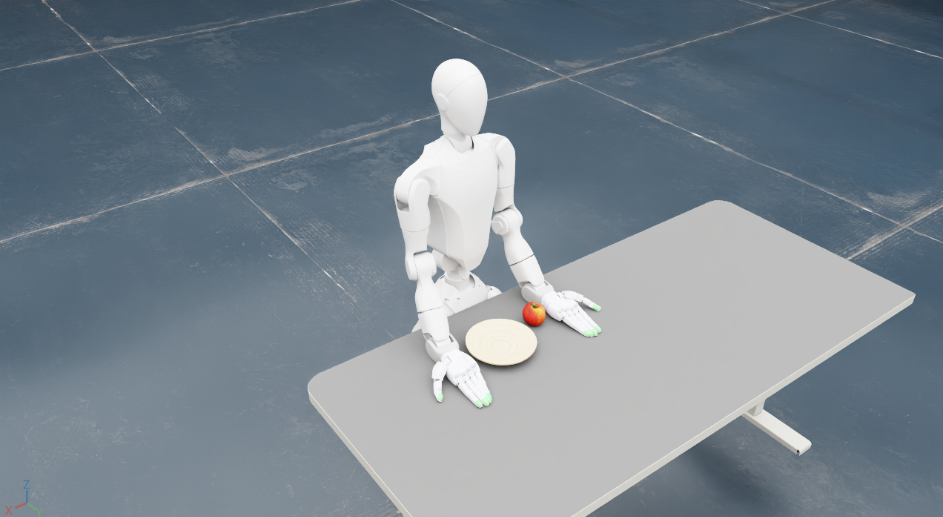
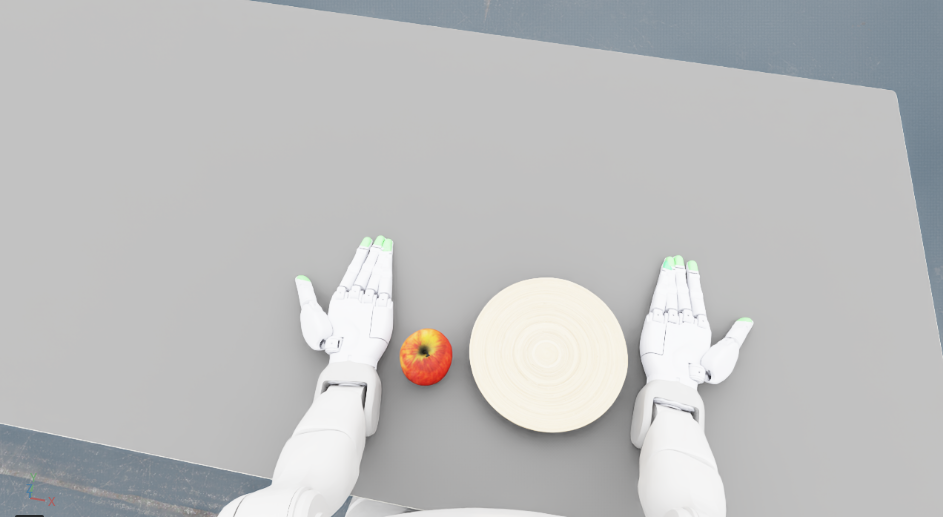
Use these views to check that the scene has loaded; wait for H2 READY
before starting a take.
Tip
To skip recording, select a published recorded or generated HDF5 in H2 dataset conversion. You can also start with our LeRobot dataset in H2 policy training or our trained model in H2 policy evaluation.
Prerequisites#
Complete H2 Simulation Validation. Run commands from the repository root on the GPU workstation. Use one terminal for CloudXR and another for recording. Keep the recording terminal open through dataset conversion.
Use --recording-lane arena --arena_embodiment h2_agile_pink with
--teleop_device motion_controllers, as shown below. H2 has no native recording
mode; selecting Arena without the H2 embodiment selects G1. Hand tracking and
Manus selectors are unsupported.
Start CloudXR#
Warning
Read the NVIDIA CloudXR license agreement
before continuing. The --accept-eula flag accepts it without an interactive
prompt. Run these commands only if you accept the terms.
In the first terminal, download the NVIDIA Isaac Capture web client matching the pinned runtime. CloudXR serves these files to the headset:
export TELEOP_WEB_CLIENT_STATIC_DIR="$HOME/.cache/e2e-reference-app/cloudxr-client/1.3.131"
curl --fail --location --create-dirs \
  https://nvidia.github.io/IsaacCapture/client/v1.3.131/index.html \
  --output "$TELEOP_WEB_CLIENT_STATIC_DIR/index.html"
curl --fail --location \
  https://nvidia.github.io/IsaacCapture/client/v1.3.131/bundle.js \
  --output "$TELEOP_WEB_CLIENT_STATIC_DIR/bundle.js"
After both downloads succeed, start CloudXR in the same terminal:
uv run --frozen --no-sync python -m isaacteleop.cloudxr \
  --accept-eula --host-client
Keep this terminal running during recording.
Connect the PICO headset to the workstation’s LAN, following the XR recording requirements. In the headset’s browser, open
https://<workstation-LAN-IP>:48322/client/, replacing<workstation-LAN-IP>with the workstation’s address reachable from the headset. Accept the workstation’s CloudXR certificate when prompted.On the client page, select the Pico 4 Ultra profile. Before selecting CONNECT, set the video codec to H.264 and verify the active values in the panel. The client remembers earlier settings.
Tip
For a lower streaming load, use 72 FPS, a maximum bitrate of 100 Mbps, 1792 × 1536 resolution per eye, and a 64 × 64 depth reprojection grid.
Start the Recorder#
In the second terminal, load the CloudXR environment and restore the H2 asset paths from H2 Asset Preparation:
source ~/.cloudxr/run/cloudxr.env
This loads the streaming settings. It does not set the H2 asset paths. Replace the paths below with the values from asset preparation before copying the block. Set
E2E_H2_PINK_URDFto thepink_urdfvalue from the successful setup JSON, ending inunitree_h2.urdf. The EULA exports repeat your license acceptance.export ACCEPT_EULA=Y export OMNI_KIT_ACCEPT_EULA=YES export E2E_H2_ASSET_CACHE="$HOME/.cache/e2e-reference-app/h2plus" export E2E_H2_PINK_URDF="/absolute/path/to/unitree_h2.urdf" export E2E_H2_AGILE_POLICY=/absolute/path/to/agile_velocity.onnx
Create a run directory and launch the recorder:
Choose either hand to pick up the apple, and use that same hand in every episode used together for training, across all recording sessions and datasets. The command below selects
--manipulation-hand left; change it torightif preferred, and keep that choice consistent.H2_RUN_DIR="$PWD/outputs/h2/$(date +%Y%m%d_%H%M%S)" H2_SOURCE_DEMOS=5 H2_RECORDING="$H2_RUN_DIR/source.hdf5"
mkdir -p "$H2_RUN_DIR"
./tools/launch_recorder.sh \
  --recording-lane arena \
  --arena_embodiment h2_agile_pink \
  --teleop_device motion_controllers \
  --manipulation-hand left \
  --enable_cameras \
  --device cpu \
  --num_demos "$H2_SOURCE_DEMOS" \
  --viz kit \
  --dataset_file "$H2_RECORDING"
In Isaac Sim, open XR and select Start XR. On the configured PICO client page, select CONNECT.
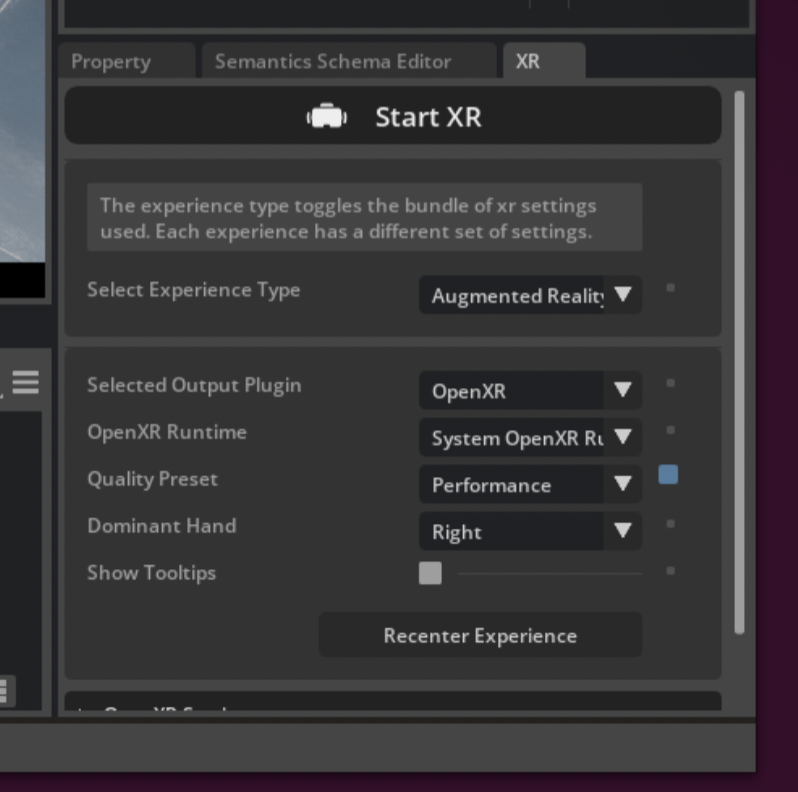
Select Start XR, then use Play on the XR recording panel for the first take.#
Wait for
H2 READYin the recording terminal. After every scene reset, the robot holds its raised hands while its stance settles. This takes three seconds of simulation time and longer in wall-clock time.Hold both handheld XR controllers in a comfortable starting pose, then select Play on the XR recording panel to start the first take. You do not need to match the robot’s raised hand height. Keep the controllers still until the terminal prints
H2 controller poses aligned to the current hands; move from this starting pose.The first valid controller poses become the reference for the robot’s current hands. Move and rotate relative to that starting pose.
Important
Startup checks can block recording if the robot has not settled or its arms are too close to the table. They do not provide collision avoidance while you teleoperate.
Perform the Bimanual Task#
The steps below assume you selected --manipulation-hand left. If you selected
right, swap left and right throughout these steps. The selected hand picks up
the apple; the other hand receives it and places it on the plate.
Pick up and lift the apple with the left hand. Either trigger or squeeze closes that hand. Releasing both opens it.
Move the apple into the right hand. Close the receiving fingers before releasing the left hand. An open receiving palm does not count as a grasp. Keep the apple off the table during transfer.
Lower the apple onto the plate, release it, and move both hands clear. Hold the completed pose through the automatic success capture.
After each non-final success, wait for
H2 READYandScene reset. Ready for the next take.Begin the next take without pressing Play or Reset.After five accepted takes, recording stops and the scene resets. The headset shows Recording complete and the saved count for five seconds, then the XR session ends and the recorder exits. Wait for dataset finalization to finish without errors and the terminal to print
Recording session completed with 5 saved demo(s).before replaying the file.
Handheld XR Controller Input |
Effect on the Robot |
|---|---|
Tracked position and orientation |
Move and rotate the corresponding robot hand |
Trigger or squeeze |
Close that hand; release both to open it |
Left stick |
Translate the robot |
Right stick |
Turn the robot |
Neutral sticks |
Apply bounded station keeping to reduce base drift |
Verify that the recorder accepts one complete handover before collecting the full batch. The recorder requires both pickup boundaries, continued grasp by the giving hand through the receiving hand’s first grasp sample, and 20 successful follow-through frames. Incomplete or ambiguous handovers are discarded and reset. The log explains each rejection. Manual success labels are disabled for H2.
Warning
Pressing Stop or Reset before automatic success labels the episode as a failure. The default export mode discards it. Interrupting with Ctrl+C retains previously saved episodes, but a partial file has not met the five-demo target.
Tracking loss or a measured joint-limit fault discards the active episode.
Recording recovers after tracking returns or the scene resets. Previously saved
episodes remain intact. Use --dataset_export_mode all only to inspect labeled
failures; it does not bypass the H2 handover or joint-limit checks.
Tip
For host-side rate diagnostics, add
--xr_runtime_metrics "$H2_RUN_DIR/recording-runtime.json" to the recorder
command. It measures the interactive loop, excluding simulator shutdown and
headset-network latency.
Replay the Accepted Episodes#
In the recording terminal, replay every accepted episode:
./tools/launch_replay.sh \
  --lane arena --replay-mode state --strict --device cpu --viz kit \
  --expected_episodes "$H2_SOURCE_DEMOS" \
  --dataset_file "$H2_RECORDING"
The episode-count check rejects partial recordings. State replay restores the saved scene at each frame so you can review the recorded motion.
--strictrequires all selected frame streams and cleanup to complete.Select the accepted source episodes for conversion:
H2_TRAINING_HDF5="$H2_RECORDING"
H2_TRAINING_DEMOS="$H2_SOURCE_DEMOS"
If you open another terminal, restore the H2 asset exports and the values of
H2_RUN_DIR, H2_SOURCE_DEMOS, H2_RECORDING, H2_TRAINING_HDF5, and
H2_TRAINING_DEMOS from this run.
Expected Result#
$H2_RUN_DIR/source.hdf5 contains five finalized, accepted simulation episodes
and passes strict state replay. XR input mapping, robot-control behavior,
criteria for accepting recordings, and
replay limits are described in H2 Architecture and Data Requirements.
Next Stage#
Continue directly to H2 Dataset Conversion. To expand the dataset first, use optional H2 Data Generation With Isaac AutoData.